Root Canal Obturation
#D3/S2/W4
#Endo
Role of obturation in microbial control
- fill and seal entire root canal system
- prevent any communication between oral cavity and periradicular tissues
- entomb any surviving bacteria within the root canal system
- prevent tissue fluid from reaching bacteria in the canal space and maintaining their survival
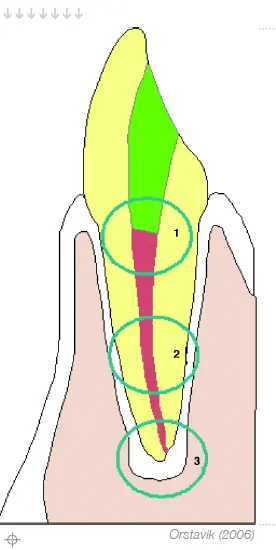
Effective canal sealing can overcome cleaning limitations
- evidence for bacterial entombment
- 70% of cases which returned a positive culture at obturation still healed (sjogren et al 1997)
- elimination of bacteria is not strictly necessary, and maximum reduction of bacteria and effective canal filling may be sufficient in terms of healing (sathorn et al 2005)
- killing of bacteria should continue after obturation of the root canal via
- antibacterial properties of obturating materials
- deprivation of nutrients and space
- limited variety of bacteria with which to maintain co-operative nutritional relationships
Ideal root canal filling
- 3 dimensional sealing of entire root canal system
- sealing all foramina leading to periodontium
- without voids
- adapt to instrumented canal walls
- end at working length
Terminology - technical quality
- length
- over extended, under extended, to length, over filled (sealer only)
- homogeneity and density
- homogenous / well compact / dense, non homgenous / undercompacted, voids
- shape and taper
- under prepared, over prepared,
- filled canal is funnel shaped
- filling material removed to correct level
- removed from pulp chamber and does not extend coronal to CEJ
Root canal filling - technical quality
- poor quality root canal treatment is related to periapical disease
- root filling of substandard technical quality are prevalent findings in most population studies and are associated with a high rate of periapical inflammation
- ideal obturation
- canals filled to predetermined working length
- root filling well compacted/homogenous
- dense with no voids
- canal is appropriately enlarged and funnel shaped
- filling material does not extend coronal to canal orifices
- Poor obturatoin
- canals poorly filled (under compacted) with visible voids in more than 20% of the canal
- under extended by 2mm or more
- over extended by 1mm or more
- features associated with poor clinical healing
- **Radiographic appearance is important but
- technical quality from radiograph alone cannot be used to determine prognosis
- does not indicate that cana lis clean
- disinfection process is most critical for the outcome (spangberg 2002)
Materials
- minimal amount of biocompatible sealer is used in conjunction with core filling material
- gutta percha core filling material of choice for past 150 years
- sealers required to enhance seal of core filling material by filling any residual space (including dentinal tubules) and to provide union between core filling and root canal wall
Efficacy of root filling - sealing from coronal leakage
- ideal root filling wouldf prevent apical egress of fluids and irritants to the periapical tissues (hermetic/hydraulic/fluid tight seal)
- no predictability sealing root filling material
- root dentine flexis in fection
- dimension change, sealer dissolution, occlusal loading all contribute to loss of seal
- In vitro leakage studies show that root fillings do not hermetically seal the root canal, however methodological flaws mean that these studies cant be extrapolated to the clinical setting
- clinical studies
- well filled canals can resist bacterial penetration even after an oral exposure of several months
Gutta percha
- isonandra percha trees
- trans polymer of isoprene (polyisoprene), of natural rubber which is cis polyisoprene. trans form more brittle, harder, less elastic
- GP points contain 20% gutta perch,a 70% ZnO, waxes, colouring agents, antioxidants, metallic salts
- plasticity allows it to be compacted into root cnaal space
- advantage
- low toxicity, dimensional stability, adaptability, removability in case of retreatment
- exists in two crystalline states
- alpha phase - flow sticky, compactible, better adaption, softens at a lower temp, used in thermoplastic techniques
- beta phase - solid harder, non stick, compactible
Sealer
- technical goal
- maximise GP volume, minimise sealer thickness
- sealers dissolve when exposed to tissue/oral fluids
- sealers may contract after setting leaving gaps
- voids more frequent in sealer heavy fills
- Epoxy resin-based sealers
- current gold standard, clniically proven
- dimensionally stable, low solubility, biocompatible
- good tubule penetration and micromechanical adhesion to dentine (no bonding)
- Bioceramic sealers
- calcium silicated based materials with common bioactive properties
- release CaOH for interfacial layer of apatite crystals between cement and dnetine wall
- slight expansion may contribute favourably to sealing ability
- have potential to be used as predictable root canal sealer but more data needed
- no clinical evidence that using bioceramic sealers leads to better outcomes
Ultrasonic activation of irrigant
Passive ultrasonic activation
- instrument oscillates at 25-40 kHz
- multiple nodes and anti-nodes
- mechanisms of action
- acoustic streaming
- fluid movement along sides of instrument produces shear forces capable of dislodging materials
- caviation
- formation and collapse of vacuum bubbles results in shear forces
- heat
- warming NaOCl
- lateral displacement of fluid
- adjacent to instrument tip causes fluid interaction with canal wall
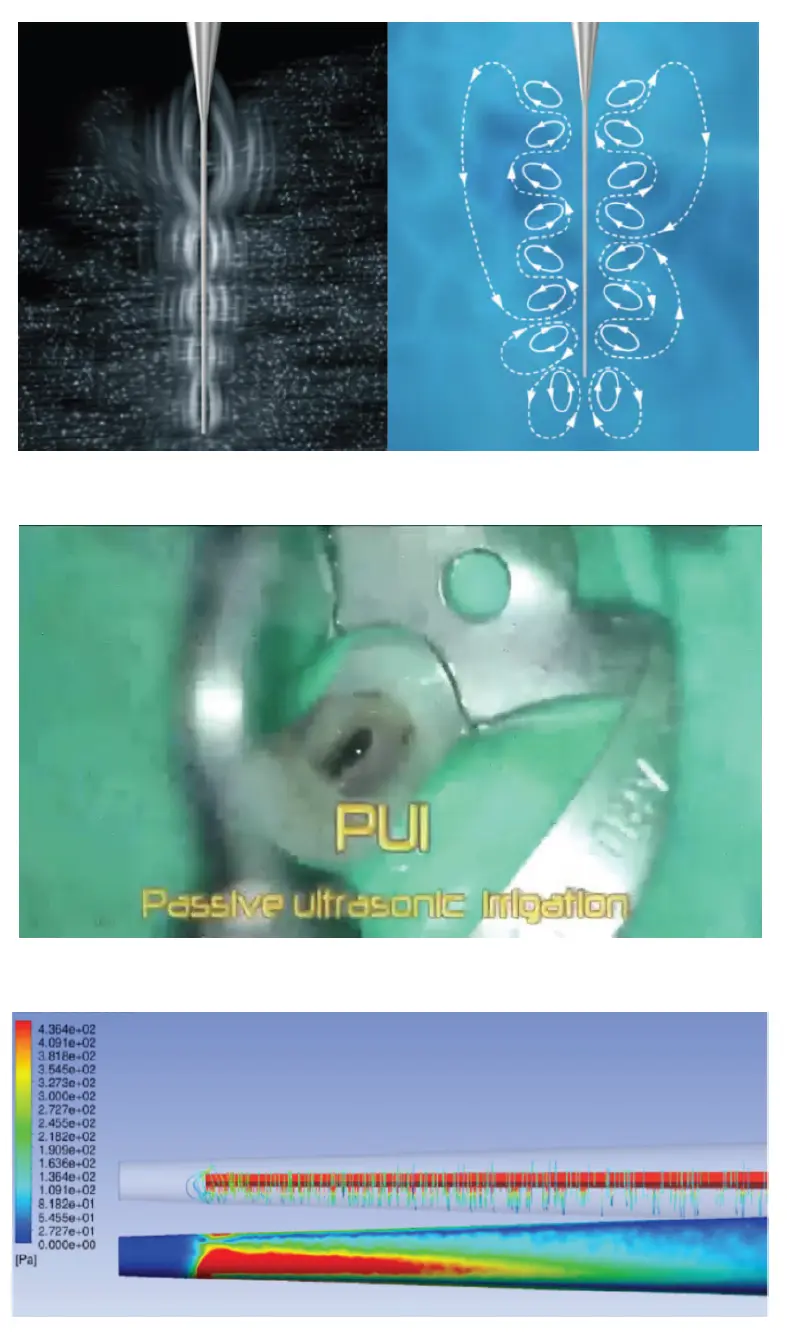
- acoustic streaming
- studies show
- one minute use after instrumentation produced significantly clear canals and isthmuses
- Boutsiokis et al 2019 systematic review
- ultrasonic more effective than syringe irrgation at removal of pulp tissue remnants and hard tissue debris
- conflicting results reported by microbiuological studies
- safety
- concerns in curved canals
- all types of ultrasonic may result in uncontrolled removal of dentine
Ultrasonic activated irrigation - NaOCl
- use intermittent flushing (1min to 1.25 min/canal)
- flush canal with 1.5-2ml NaOCl, agitate15-20 sec/canal.
- Reflush with 1.5-2mL NaOCl, agitate again 15-20sec/canal.
- Dry canal before place EDTA
- flush with 1.5-2mL EDTA, agitate15-20 sec/canal.
- Final flush with 1.5-2mL NaOCl, agitate for 15-20 sec/canal
Role of EDTA
- aid with NaOCl removal of smear layer
- NaOCl removes organic component of smear layer
- EDTA removes inorganic component of smear layer
- removal of smear layer improves cleaning and facilitates sealer penetration into tubules
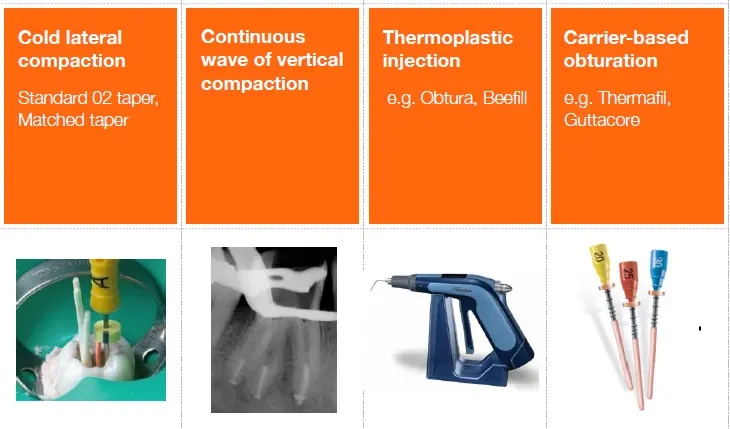
Timing of obturation
- canals should only be filled when there are no symptoms of acute apical periodontitis or an apical abscess
- no significant pain on percussion
- canals can be dried
- canals not dryable due to exudation into canal is a contraindication to obturation
- gutta percha cones should first be decontaminated by soaking in NaOCl solution for 60 seconds then allowed to dry
Lateral condensation
- most widely taught/used and the standard against which other techniques are compared
- uses solid core material made of multiple gutta percha points that are cemented into prepared root canal with a sealer cement
- master GP cone with apical diameter matching size of root canal preparation is select4ed so that it figts tightly in most apical part of canal
- MGP cone is compacted using a spreader which creates space for some accessory GP cones
- condensation is predominantly lateral
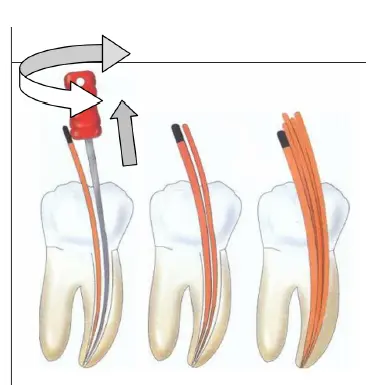
Armamentarium
- MGP
- size matched to canal preparation
- should display tug back/resistance on withdrawal
- good match at apex enhances apical seal and helps prevent over extension
- accessory cones
- more tapered and come to point
- NiTi finger spreader
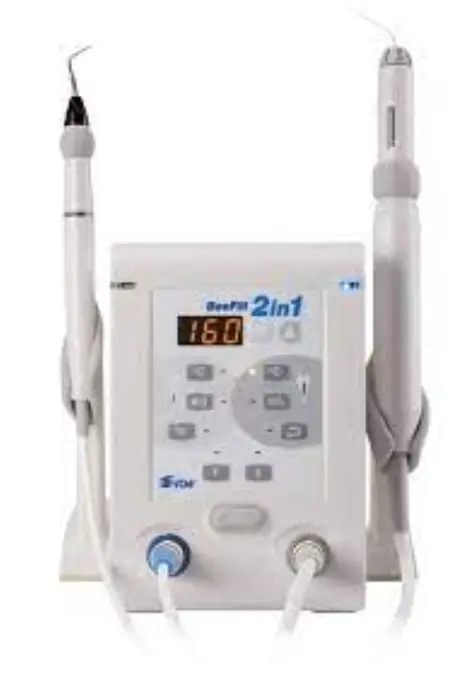
- BeeFill
- heating gutta percha
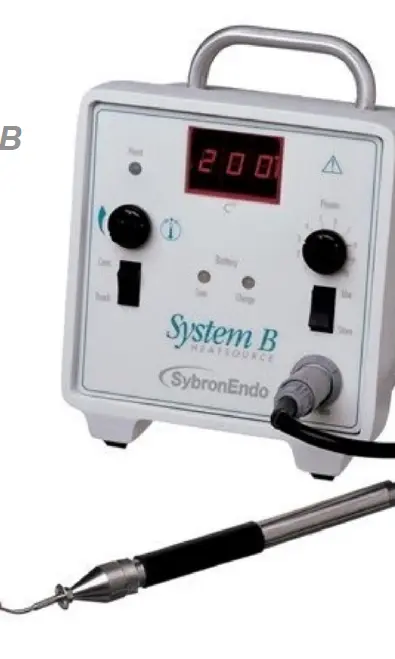
- working temp 200 deg C
- System B
Matched taper lateral compaction
- each canal in multi canal tooth is obturated separately
- select MGP cone of same size and taper as MAF
- measure length of MGP to same length as working length
- introduce MGP into canal to WL
- adjust MGP for tug-back at WL
- MGP cone checked for:
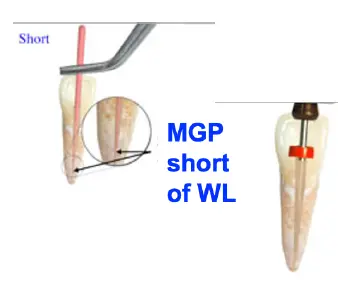
- not short of working length
- cannot penetrate beyond WL (over extended)
- if MGP cone is loose at WL
- select larger cone of same taper
- if large cone won't go to WL
- trim tip of original MGP until tug back at WL
- if MGP is short of WL
- means that
- under prepared and MAF has not prepared to WL or
- filled with debris that has not been flushed out
- MGP cone has a larger diameter than the canal prep
- re check MAF can reach WL, check MAF rotates at WL by hand
- assess canal for presence of blockages
- reinsert MGP after this reinstrumentation
- means that
- if mGP still short of WL
- MGP too wide and smaller size is required
- if smaller MGP cone reach WL but no tug back, MGP cone diamete is not wide enough, trim until tug back at WL
- if MGP longer than WL
- cut tip until placed to correct WL with tug back
- confirm MGP extends to WL by measuring
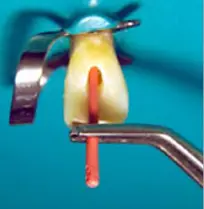
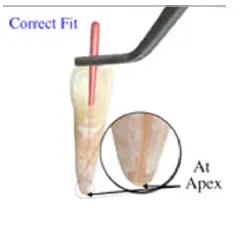
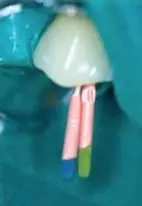
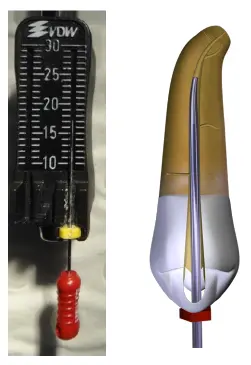

once MGP cone extends to WL with tug back
- mark MGP at working length by crimping with tweezers
- creates crimp mark at reference point
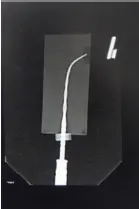
- check length with radiograph (MGP cone radiograph)
- should extend to same length as MAF on MAF radiograph
- set rubber stopper on #25 niti finger spread to 2mm shorter than WL
- spreader should penetrate no further than 2mm short of WL
- dry root canal with paper points measured at WL
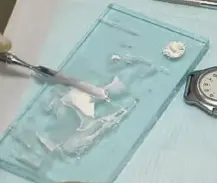
- mix root canal sealer
- coat MGP with sealer to 4mm along length on all sides
- insert MGP slowly into canal to WL
- insert finger spreader along side MGP with light pressure until resistance is felt
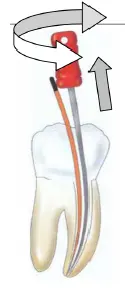
- slowly remove spreader from canal whilst rotating clockwise anticlockwise to prevent cone coming out with spreader
- accessory cone which corresponds to size of spreader is coated with sealaer and inserted into space created by the spreader
- repeat process with more accessory GP until spreader will not penetrate deeper than 2-3mm into root canal
- always take mid obturation radiograph,
- check for length and homogeneity of condensation
If root filling length and homogenity is adequate on mid obturation radiograph
- sear excess GP off at canal orifice level with Beefill or system B
- activate heat tip no more than 1 second per insert and no more than twice in 15 seconds
- can also use slow speed pulp bur brushing GP
- condense GP vertically using 5-7 plugger
- clean pulp chamber of excess sealer with cotton pellet soak in alcohol
If root filling homogeneity is still inadequate after compacting more accessory cones
- revert to hybrid obturation technique
- make space in GP with beefil heated plugger or system B tip
- activate heat tip, insert into GP about halway into canal
- withdraw heat tip immediately
- when withdrawing, slide heat tip on wall of canal to prevent apical GP from being removed
- insert finger spreader until resistance is felt
- spreader should be able to penetrate deeper than before ass apical GP is not well condensed and coronal bottle neck of GP has been removed
- coat matched accessory GP cone wit sealer and insert into space created by
- repeat until spreader cannot reach more than 2-3mm in canal
- reinsert heated plugger about 2-3mm into canal
- makes space in coronal bottleneck to access middle third
- continue lateral condensation of middle and coronal third
- use #40 nitifinger spreader and F accessory GP points
- continue until spreader can only penetrate 1-2mm into canal
- sear excess GP off at canal orifice level and condense/clean
Obturation technique should be matched to preparation technique
Matched taper lateral compaction
- rotary NiTi machines canal to precise shape/taper
- MGP cone matches prepared shape
- uniform thin layer of sealer
- resistance to apical displacement
- minimal accessory cones
- more uniform mass of GP, less sealer, less spreader tracks and voids
- advantages
- matched to biological preparation philosophy
- simple predictable less technique sensitive
- excellent length control
- efficient and cost effective
- can be combined with warm vertical technique in coronal portion
- limitations
- GP does not enter all canal ramifications
Continous wave of condensation (warm vertical)
- electric heat plugger used to thermoplasticise and verticall compact a matched taper GP cone to within 3-5mm WL in a single downpack
- resistance to overfilling provided by preparation shape with large taper and smaller apical size (20-30)
- backfill with a warm GP delivery system
- advantages
- good adaptability and flow of GP into canal irregularities, questionable in apical third
- filling lateral canals - but these were never completely cleaned or sealed
- limitations
- canal prepartion shape focuses on obturation phase rather than maximum bacterial control
- technique sensitive - void and overfills
- heated plugger must reach within 3mm of WL for apical GP to adapt
- plugger restricted in curved canals
lateral vs warm vertical
- no difference in outcome
- both can be successful
- failure usually due to improper cleaning and hsaping, or lack of competence in obturation technique
Is obturation of the correct standard?
- accurate MGP cone radiographj
- accurate MGP cone fit (tug back)
- mid obturation radiograph to length
- homogenous dense fill (completed obturation radiograph)
- no extrusion of core material beyond apex
- final fill extends to WL
- no filling material coronal to CEJ
Large diameter opening
- if apical size greater than #60, consider using MTA apexification (apical barrier) technique
- create barrier of MTA at the apical canal, there warm lateral compaction against it
Carrier based obturation
- carrier matches MAF
- GP heated in an electric oven and inserted with minimal sealer
- vertical + lateral compaction
- advantages
- excellent density/adaptability/flow of GP into canal irregularities at all levels
- very thing sealer layer
- quick and simple
- limitations
- extrusion of GP/sealer
- GP stripper from carrier on insertion
- some canal shapes unsuitable
- no MGP radiograph, one chance to seat carrier correctly
- retreatment
Conclusions
- long term survival will depend on
- effective antimicrobial measures
- conservative coronal flaring
- apical open size larger than traditionally possible with old SS tech
- where root filling ends
- how well compact roto filling
- good coronal restoration